Your first spec
This page covers the start of a spec: installing SpecKit Companion, creating a spec, and what the first step, specify, leaves behind. Each section says what you do and what you see. Spec-driven development explains the method behind it.
Install both halves
Section titled “Install both halves”SpecKit Companion comes in two halves. The VS Code extension is the part you look at. The Companion Spec Kit extension records each run, so the viewer has something to show.
Then, from your project root:
specify extension add companion --from https://github.com/alfredoperez/speckit-companion/releases/download/companion-latest/companion.zip --forceIf specify extension is missing, your Spec Kit CLI is the PyPI build. Install has the one-line fix.
What you see
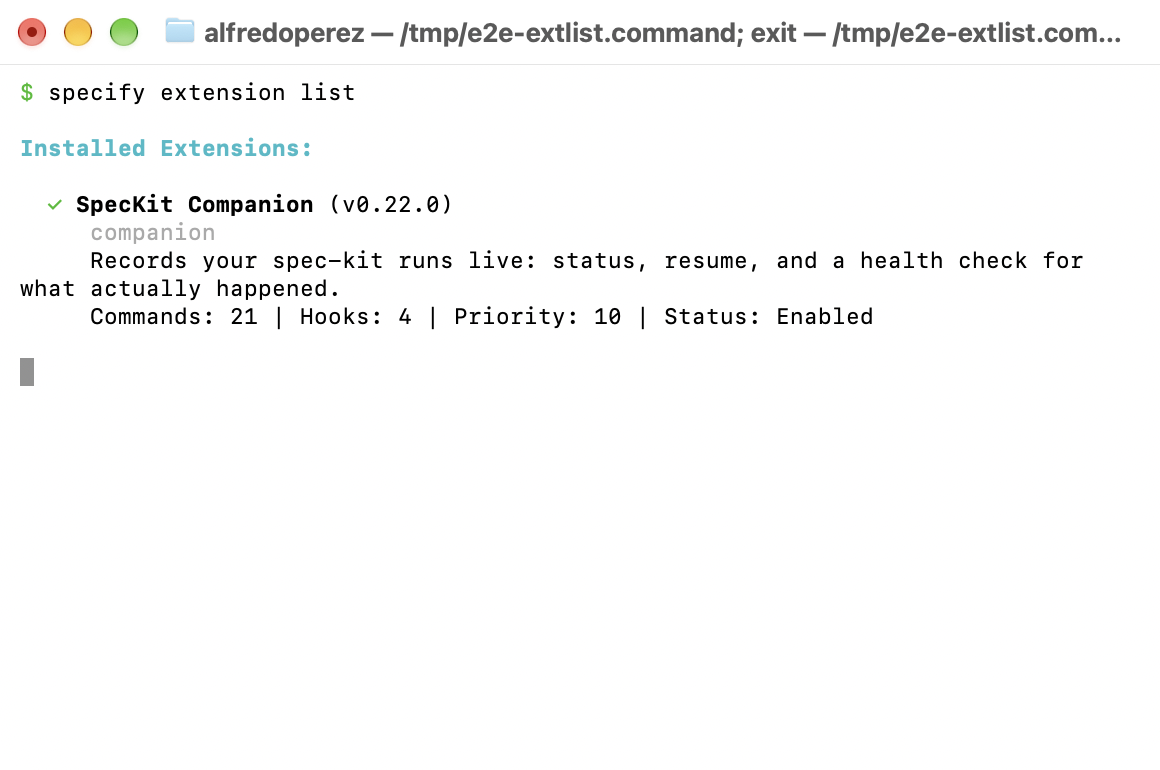
specify extension list shows SpecKit Companion, and a SpecKit icon has joined the activity bar.
Open a project
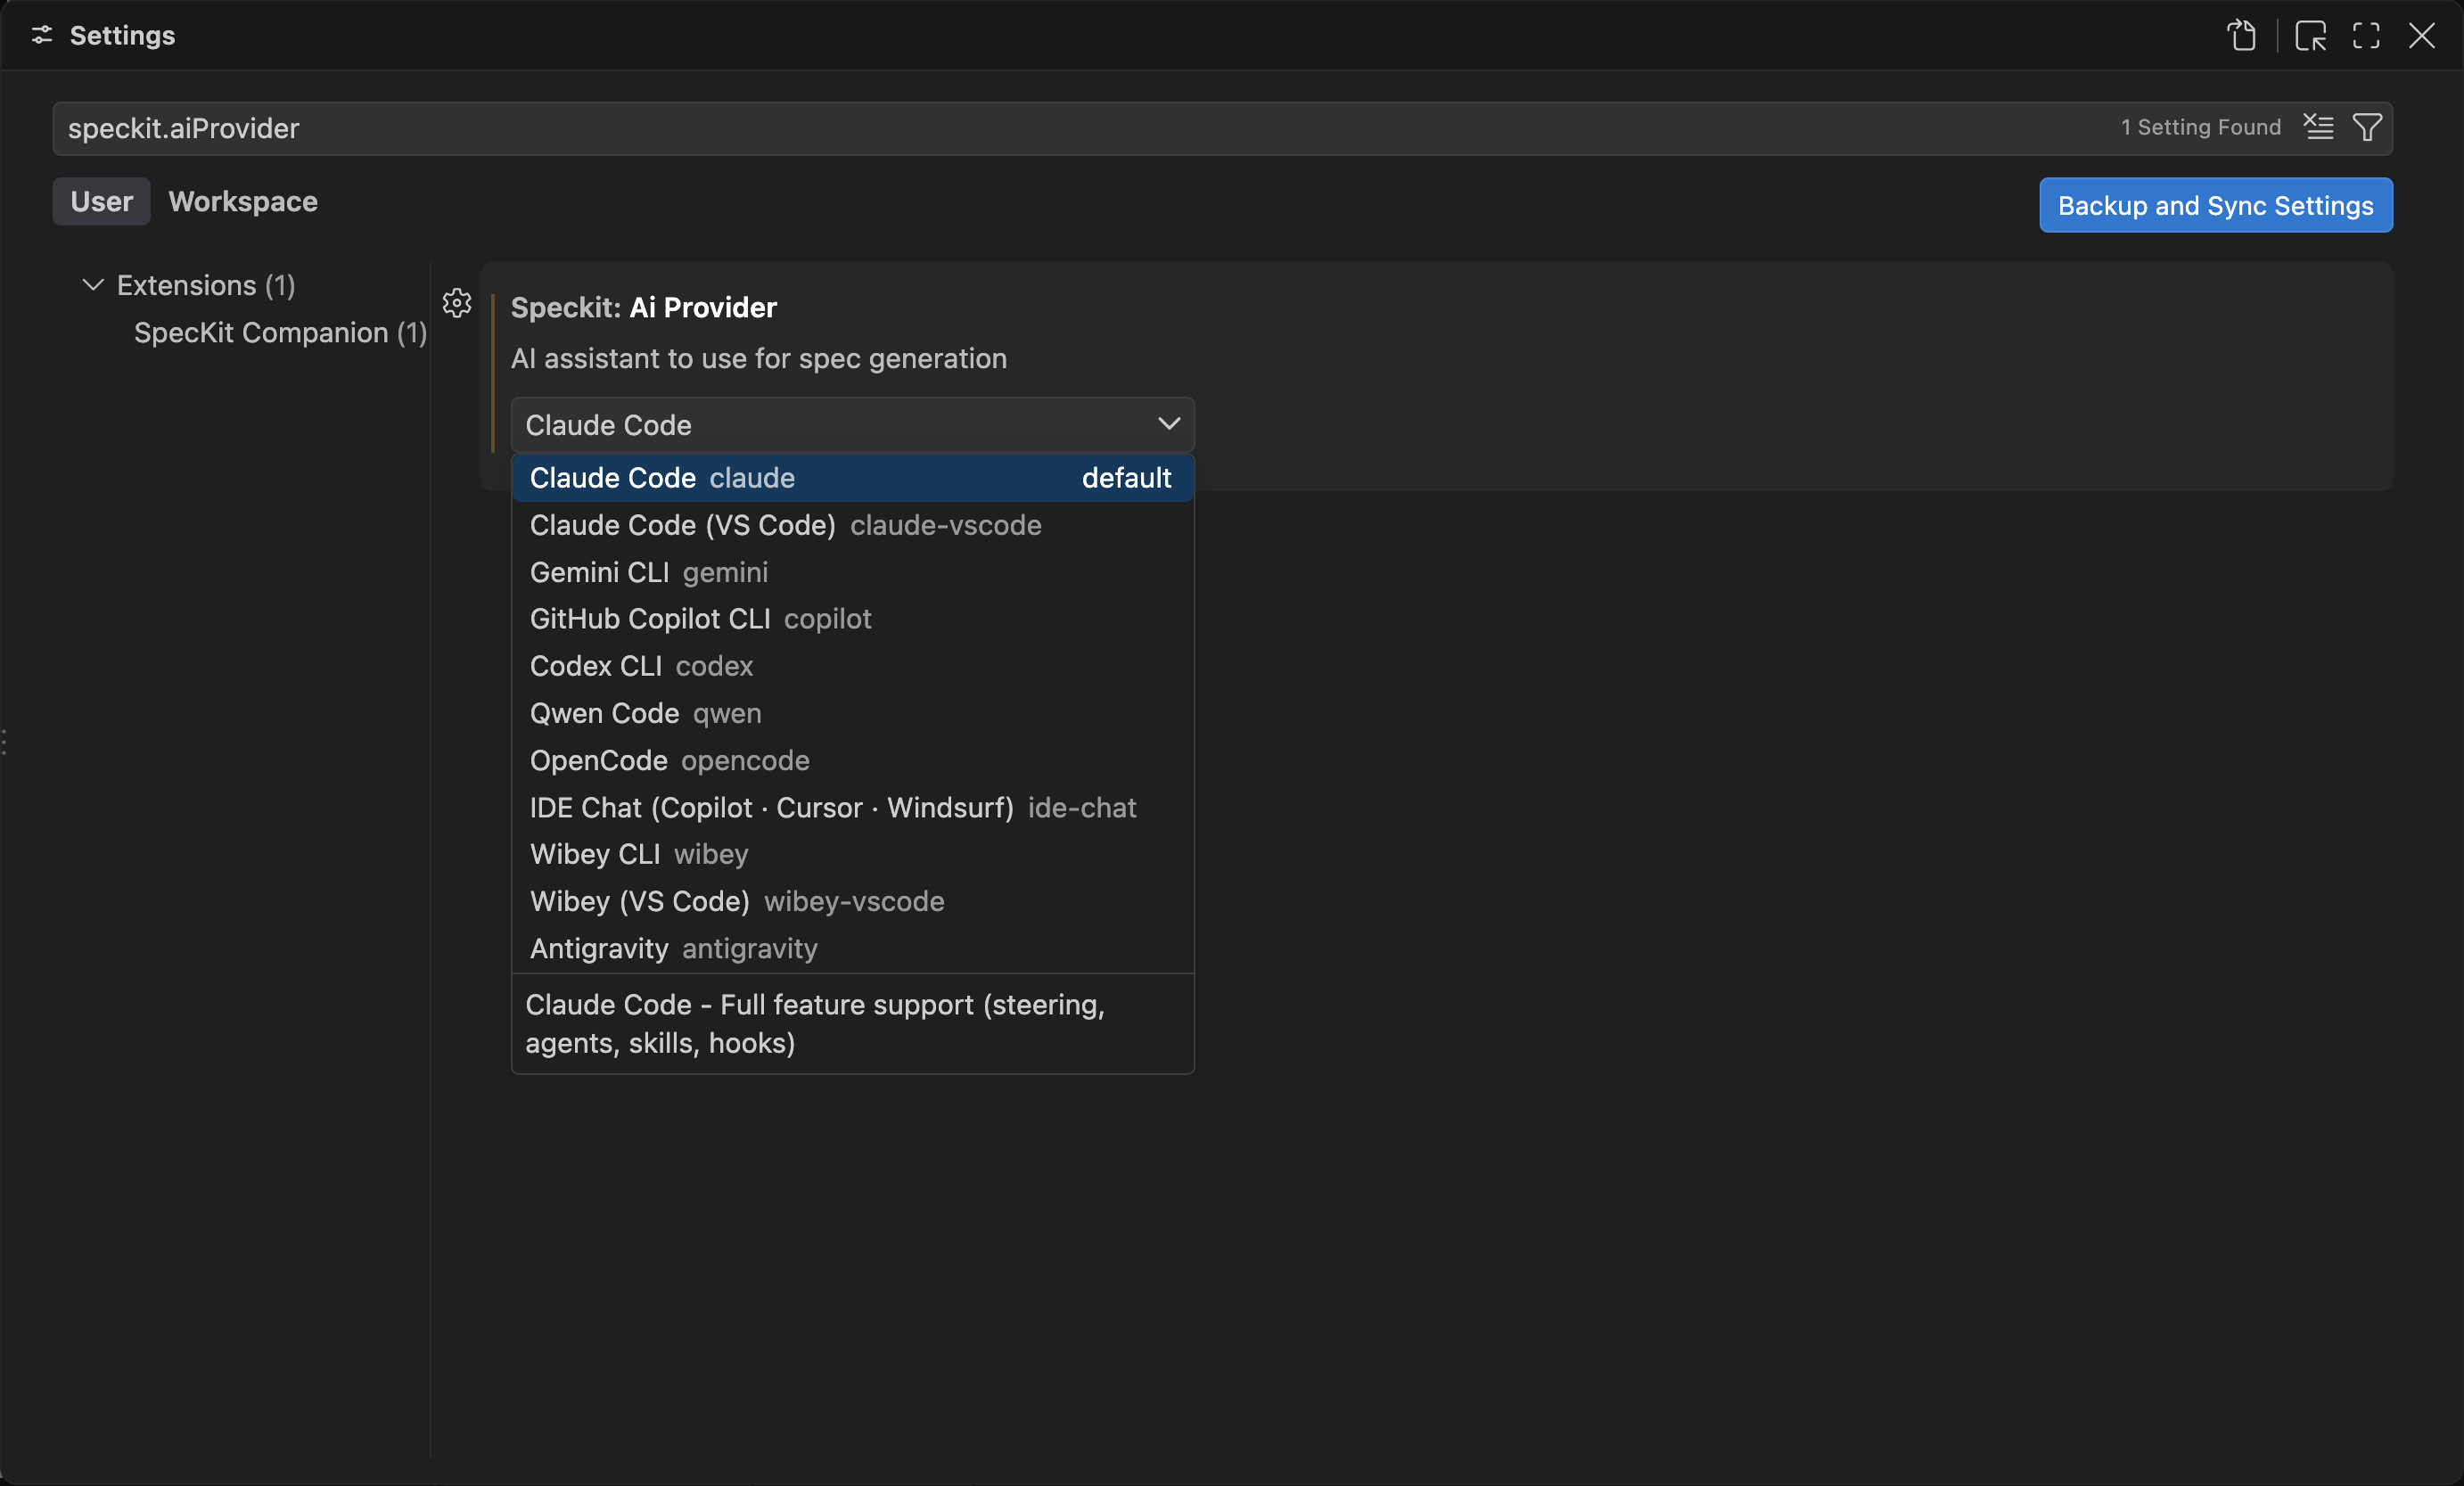
Section titled “Open a project”Open the folder you want to work in and click the SpecKit icon. In a folder that has never run specify init, the Specs view offers Initialize Workspace. It sets the project up for the assistant named in your AI provider setting, so choose that first.
What you see
A Configure Constitution prompt. The constitution holds the project’s ground rules. You write it once per project, and every spec after it is checked against it. Then a Create New Spec button.
Create a spec
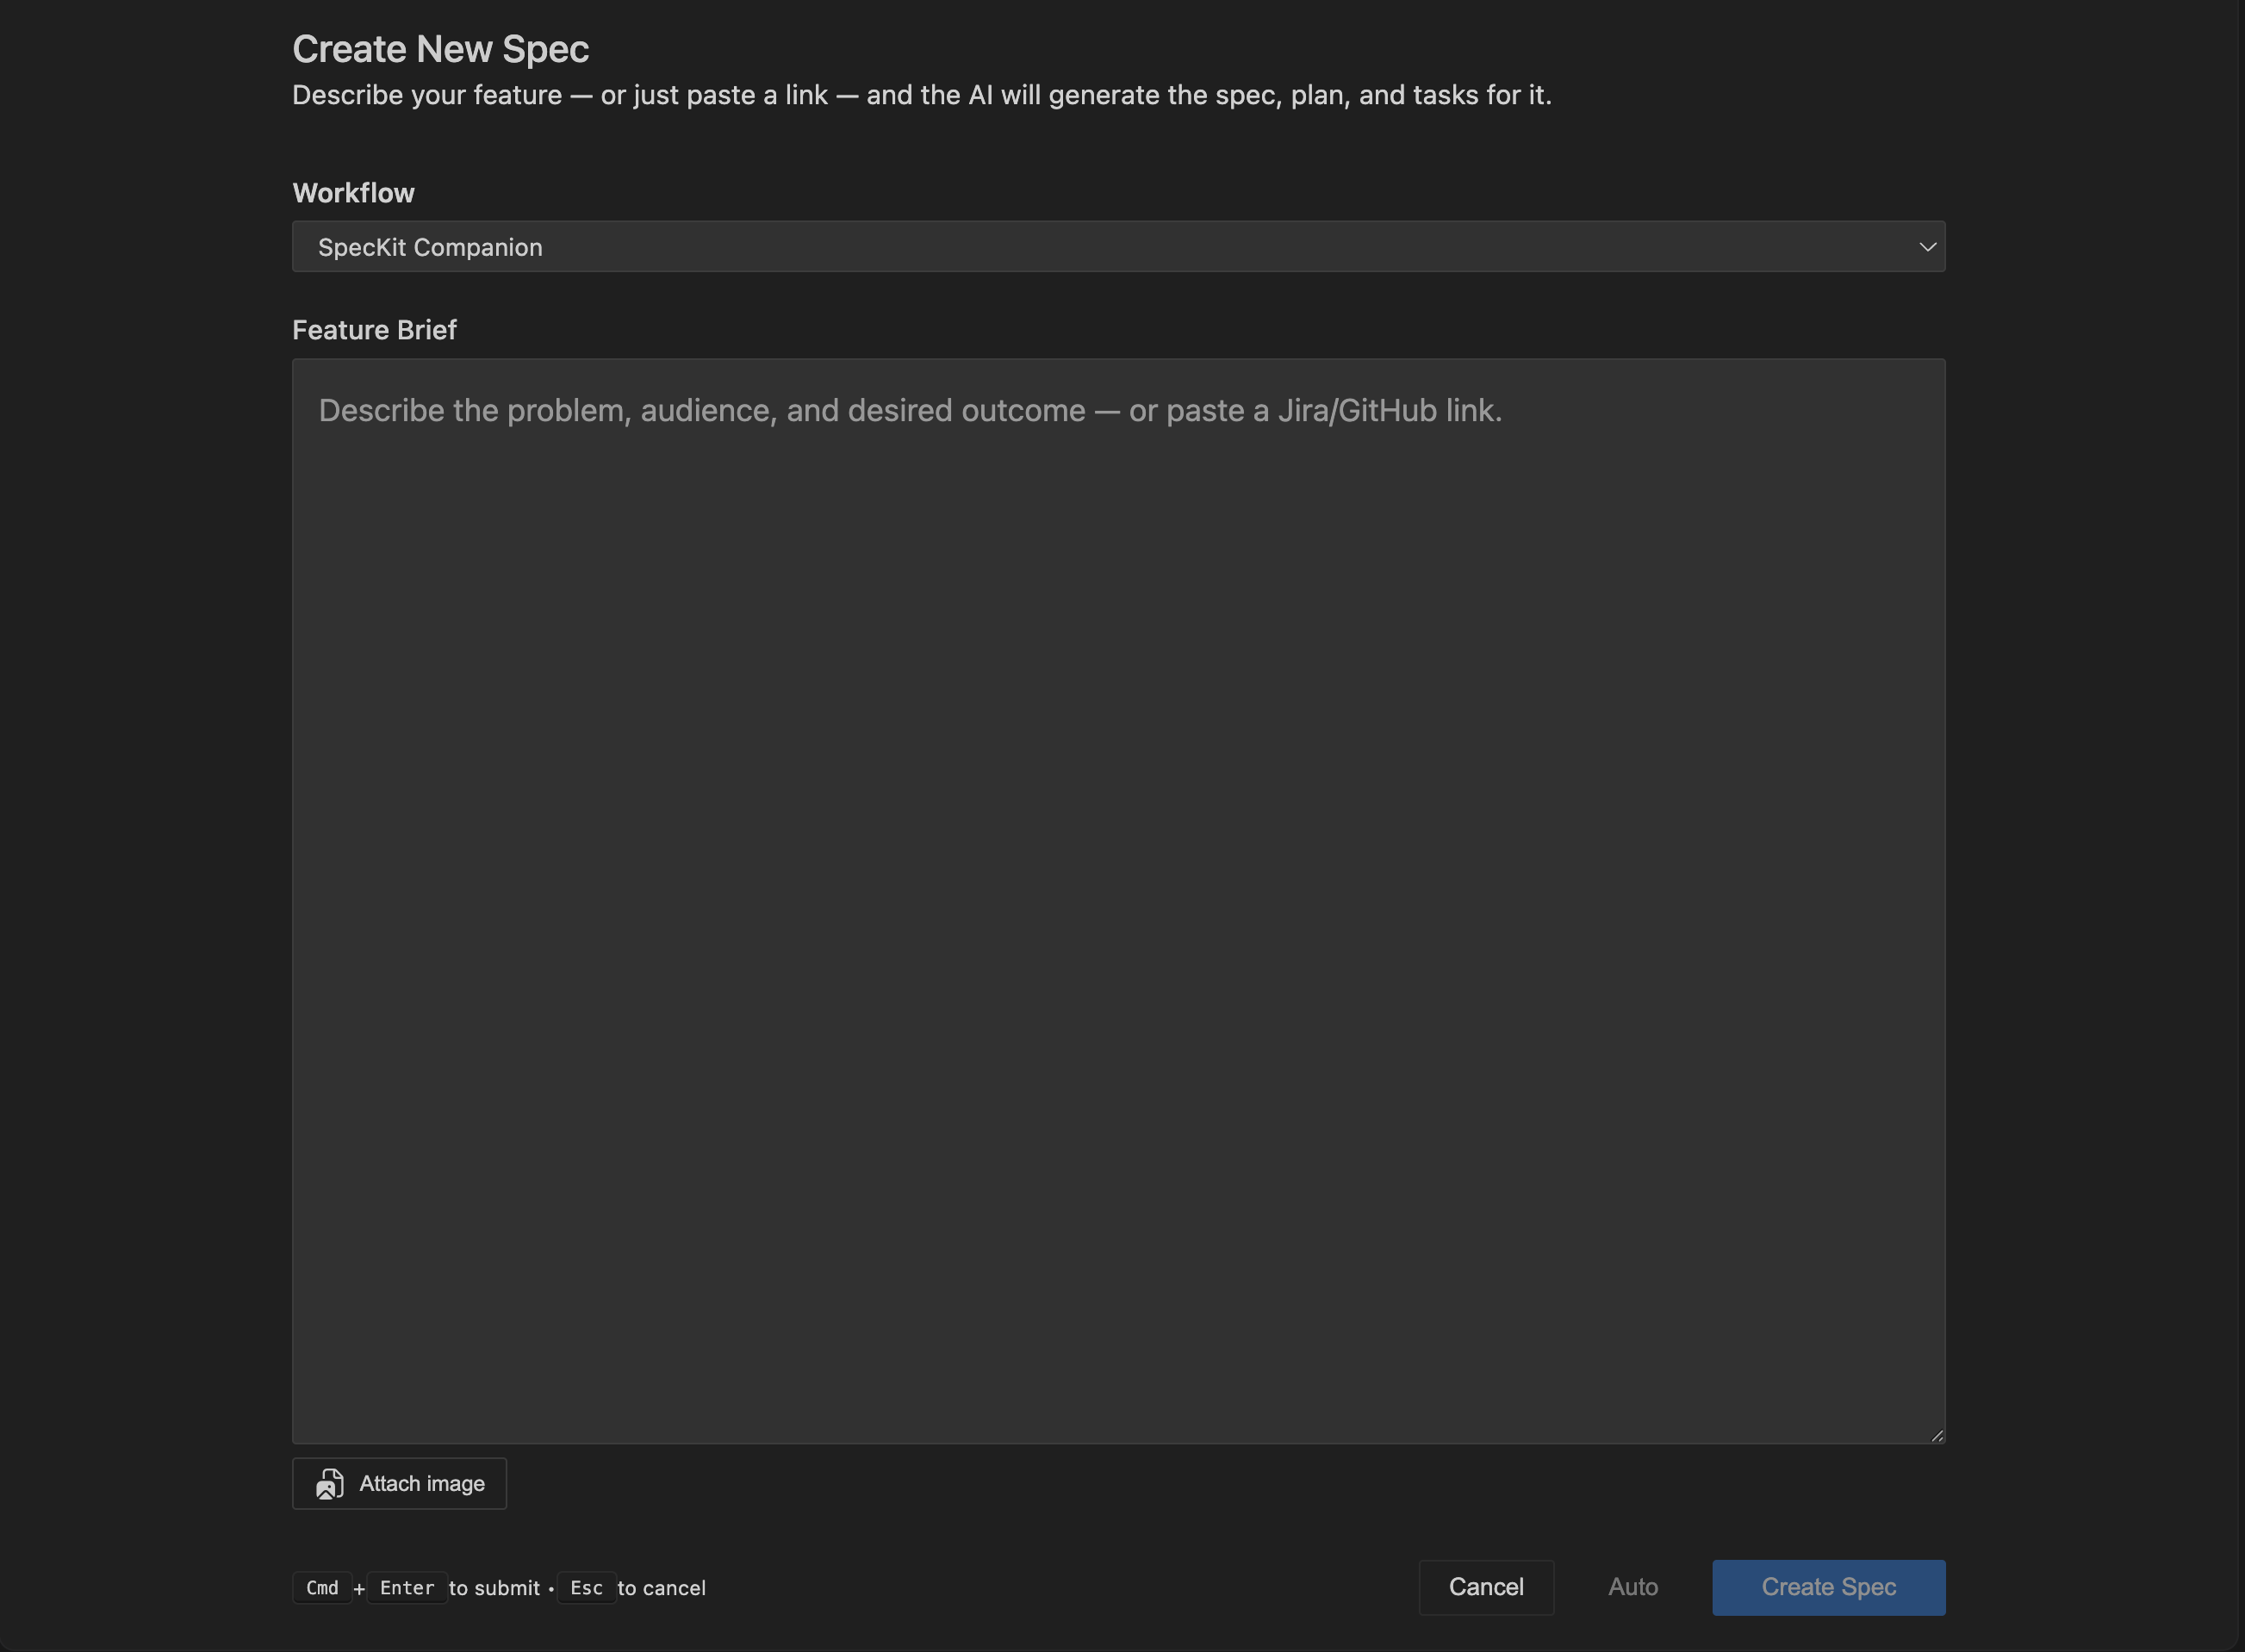
Section titled “Create a spec”Click + in the Specs view, or run SpecKit: New Spec from the command palette. The panel asks how the spec should run:
- SpecKit CompanionWorkflow menu
- Specify, plan, tasks and implement, with the spec sized to the change and marked complete for you when the work is done. Pre-selected once the Companion extension is installed.
- Spec KitWorkflow menu
- The same four steps with stock Spec Kit commands, exactly as GitHub ships them. You mark the spec complete yourself.
- AutoButton beside Create Spec
- Runs a Companion spec start to finish with no pauses. Your assistant runs it as one command, so there is nothing to pause.
Then write the brief: what the problem is, who has it and what done looks like, in a few sentences. You can paste a Jira or GitHub link instead, or attach an image. Press Cmd + Enter or click Create Spec, or click Auto to run every step.
What you see
A new spec under Active in the Specs view, with the workflow you picked recorded on it.
Watch specify run
Section titled “Watch specify run”Create Spec sends the specify command to your assistant, in its terminal or its chat. SpecKit Companion never reads the chat. It watches the files the step writes.
With SpecKit Companion, specify also sizes the change. A small one, up to 5 files and 10 tasks, gets its plan and task list in the same pass. Anything bigger, or anything hard to undo or hard to check, stops after the spec.
What you see
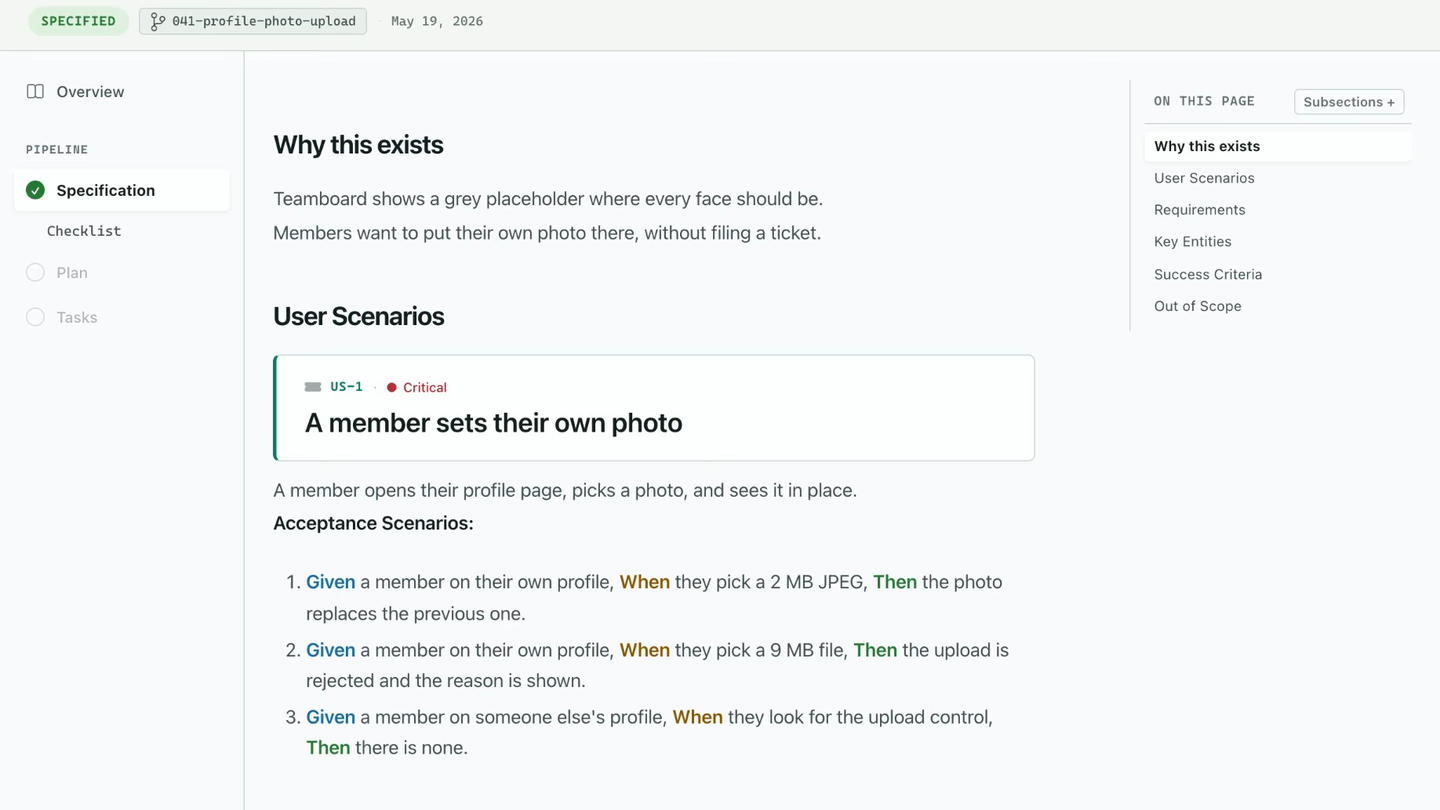
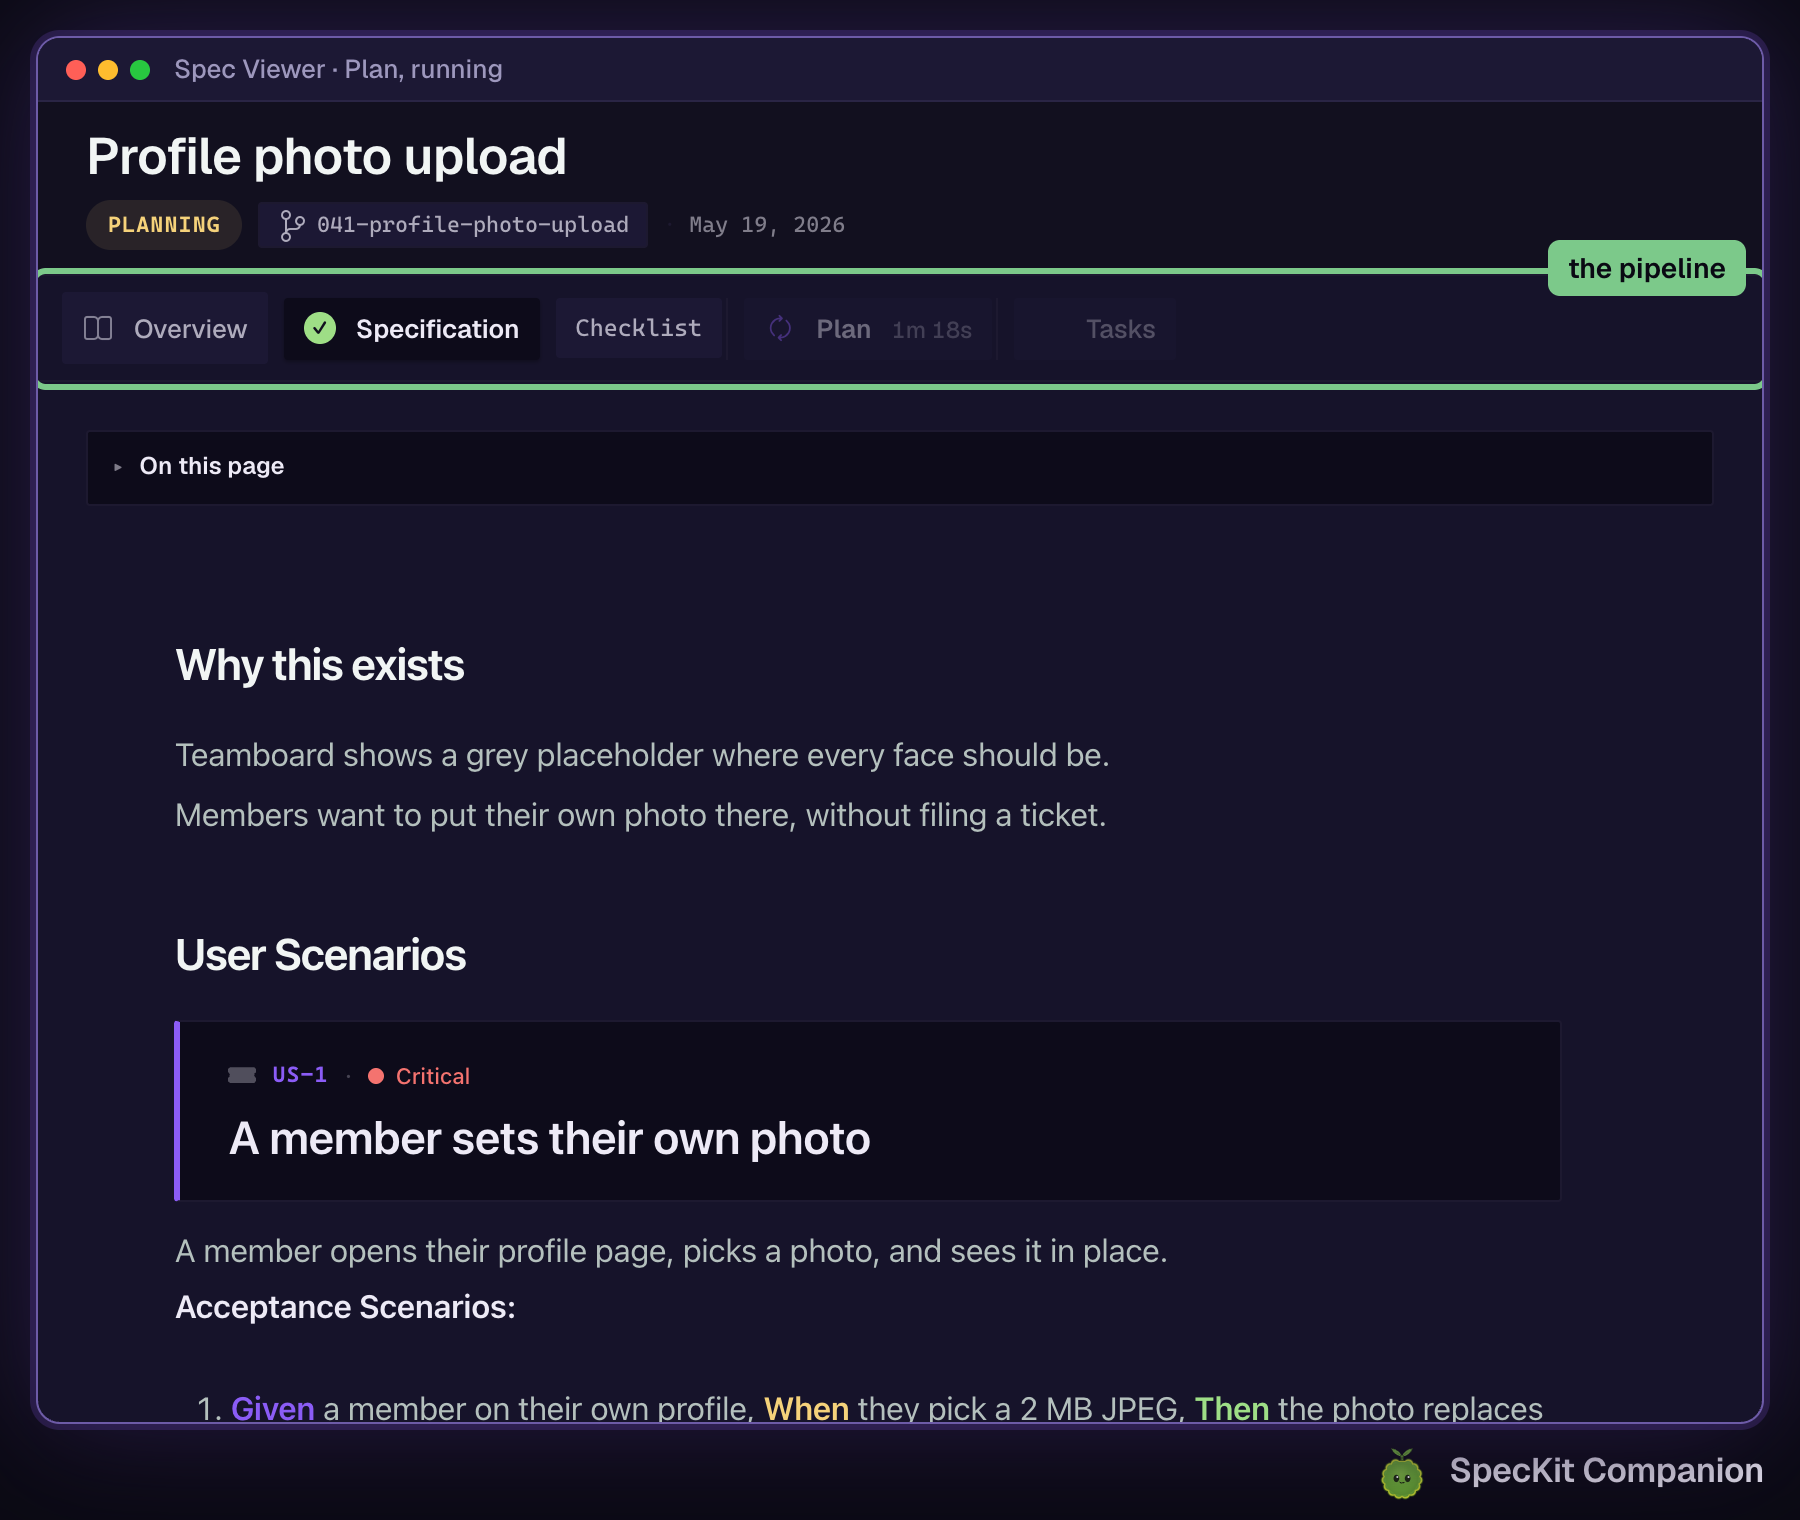
While it runs, the viewer footer says Step running, actions unlock when it settles. When it settles, Specification is checked in the rail, and Plan and Tasks stay hollow until their documents exist.
Read the spec
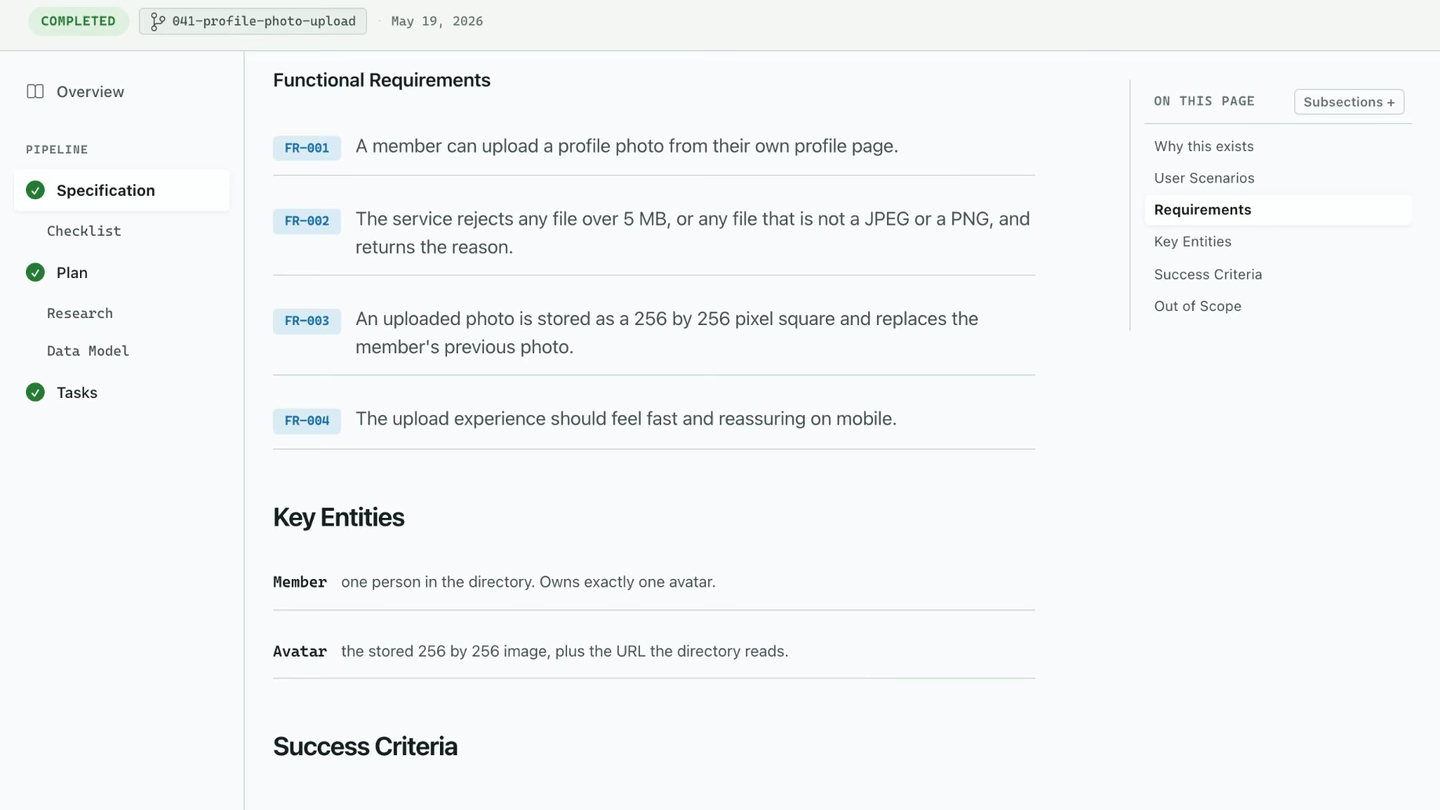
Section titled “Read the spec”Click the spec’s name in the sidebar. The spec opens as a page, with the workflow’s steps in a rail beside it.
What you see
The user stories, requirements and success criteria your assistant wrote, laid out to read rather than edit. Requirements show as labelled rows, and Given, When and Then stand out in each scenario.
Review with comments
Section titled “Review with comments”Hover any line and click the comment button that appears. Type your note and it pins under that line as Pending. When you are done, press Refine (N) in the footer to send every pending comment on the document to your assistant in one prompt.
What you see
Each comment quotes its line and section in the prompt, and the assistant edits the file in place. Sent comments flip to Applied and stay as history. Applied means sent, not checked, so read the change yourself.
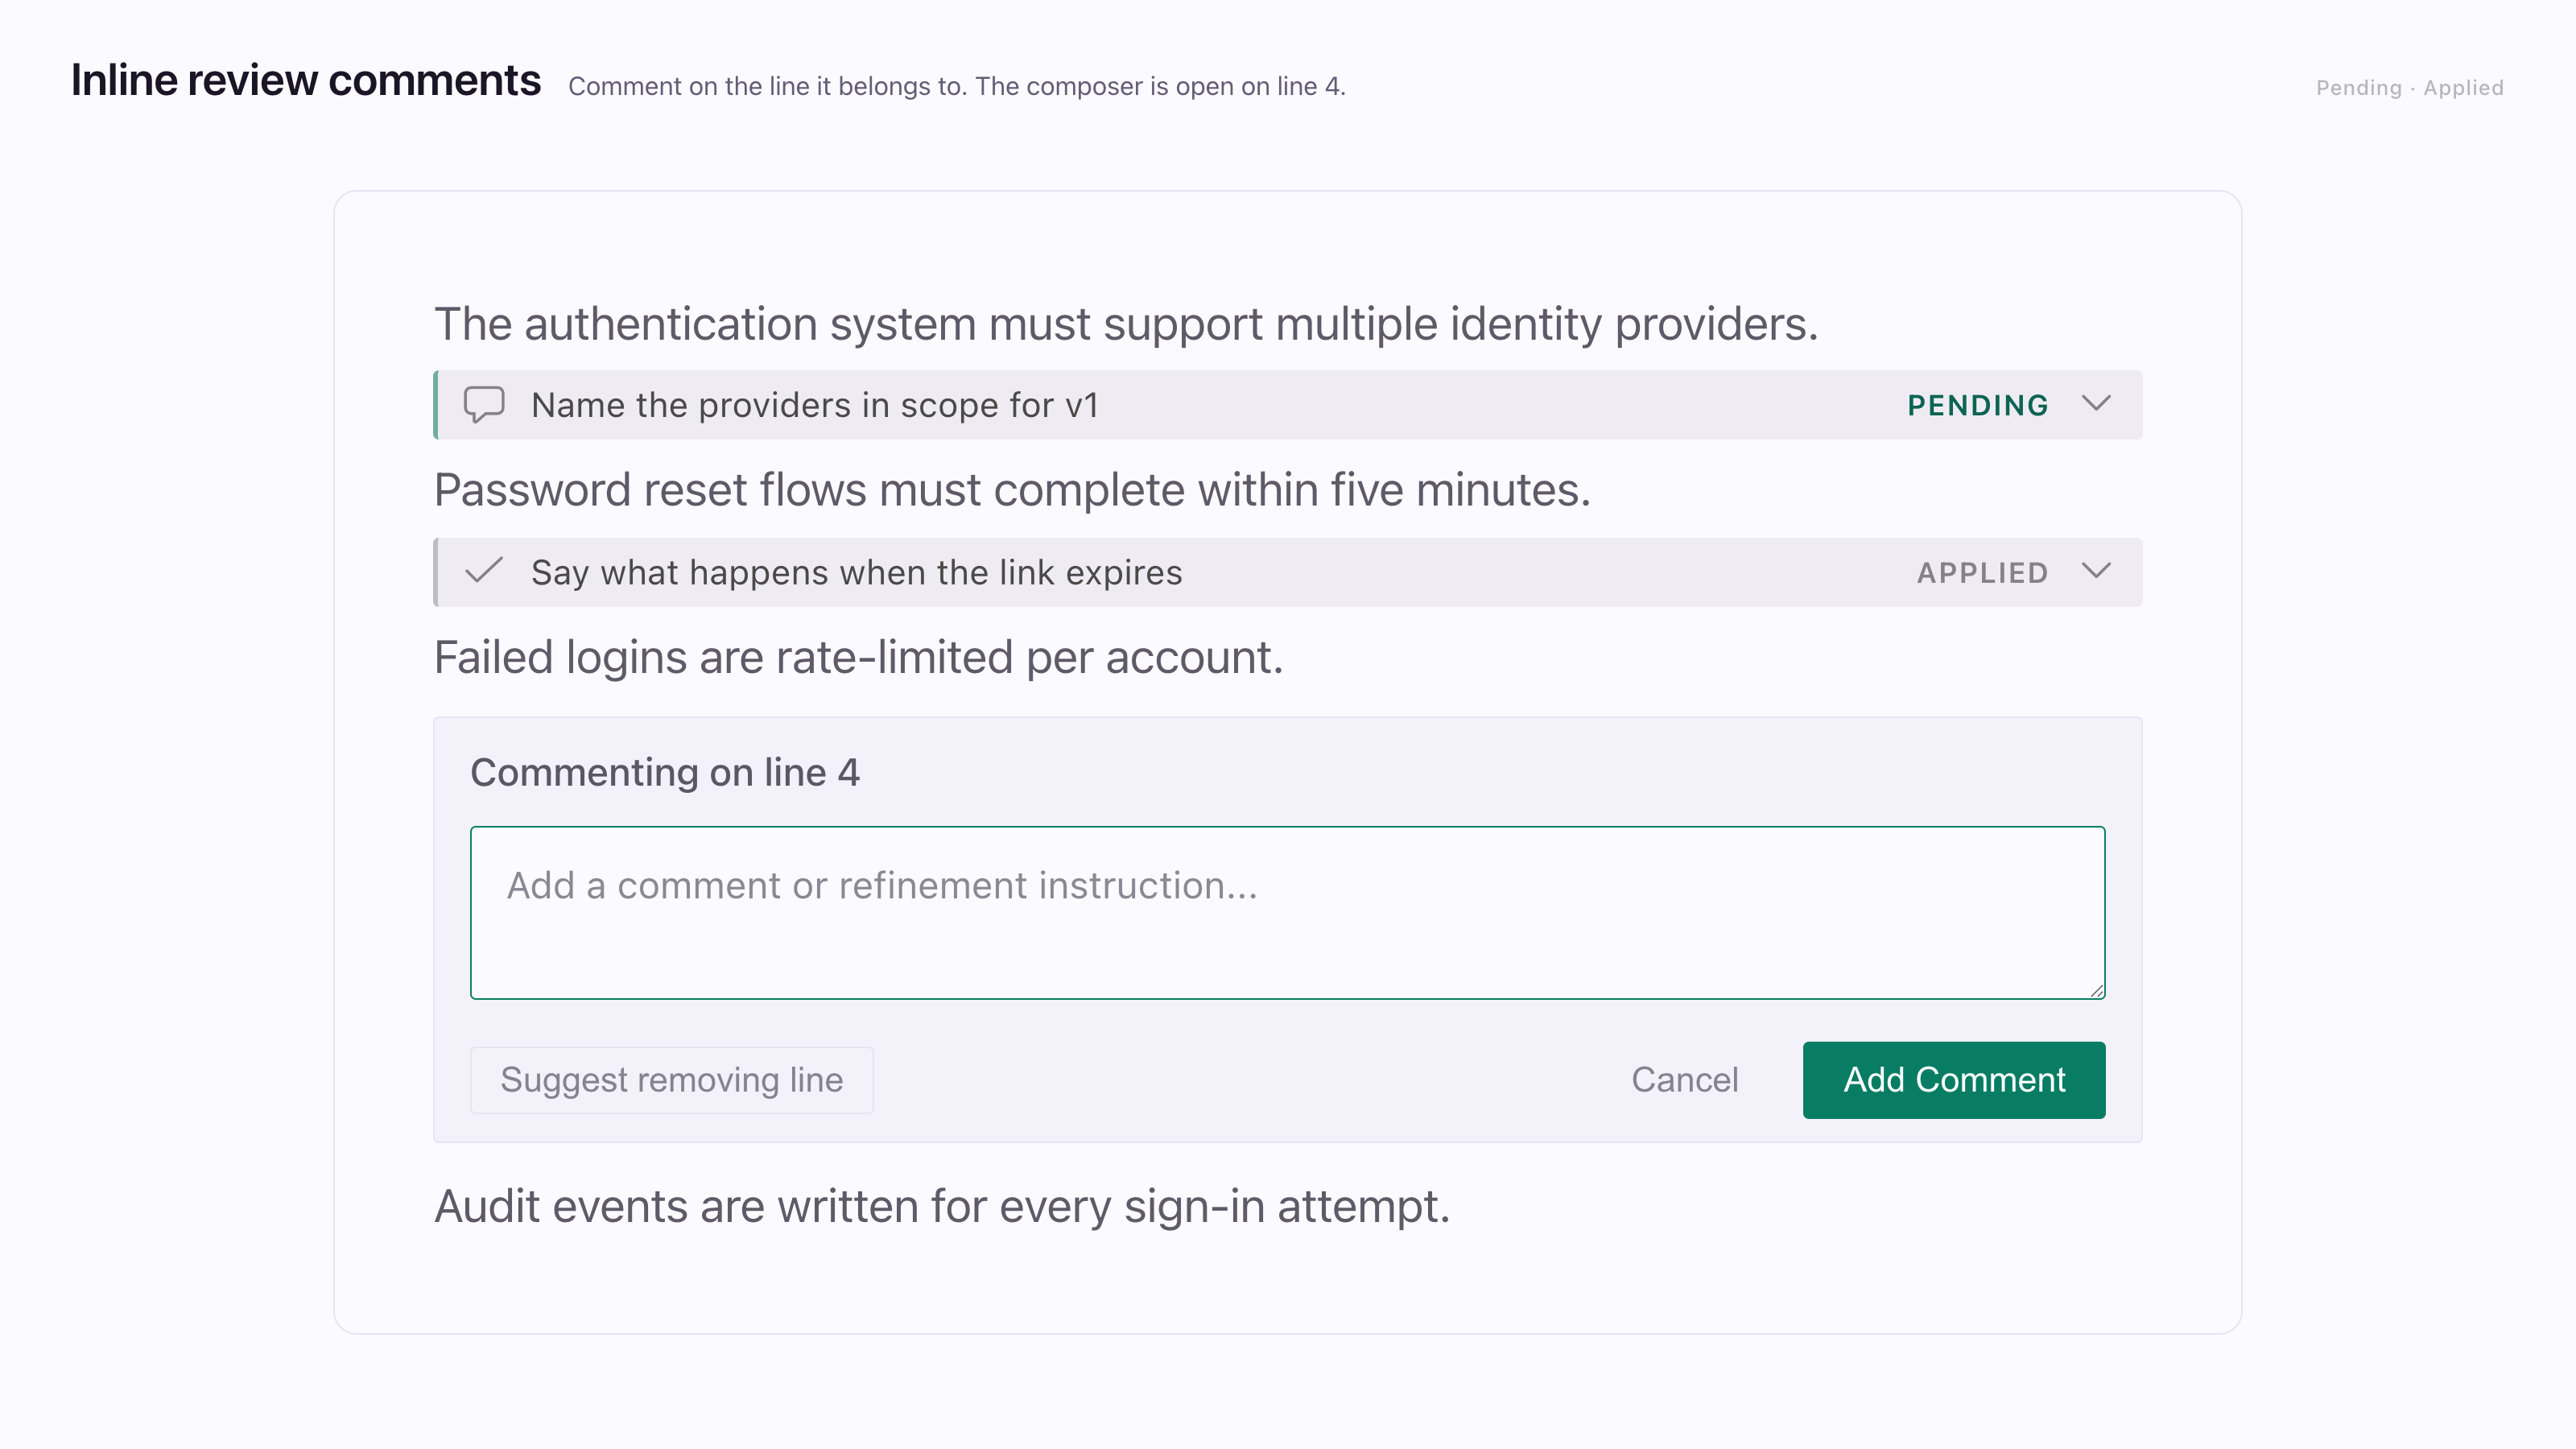
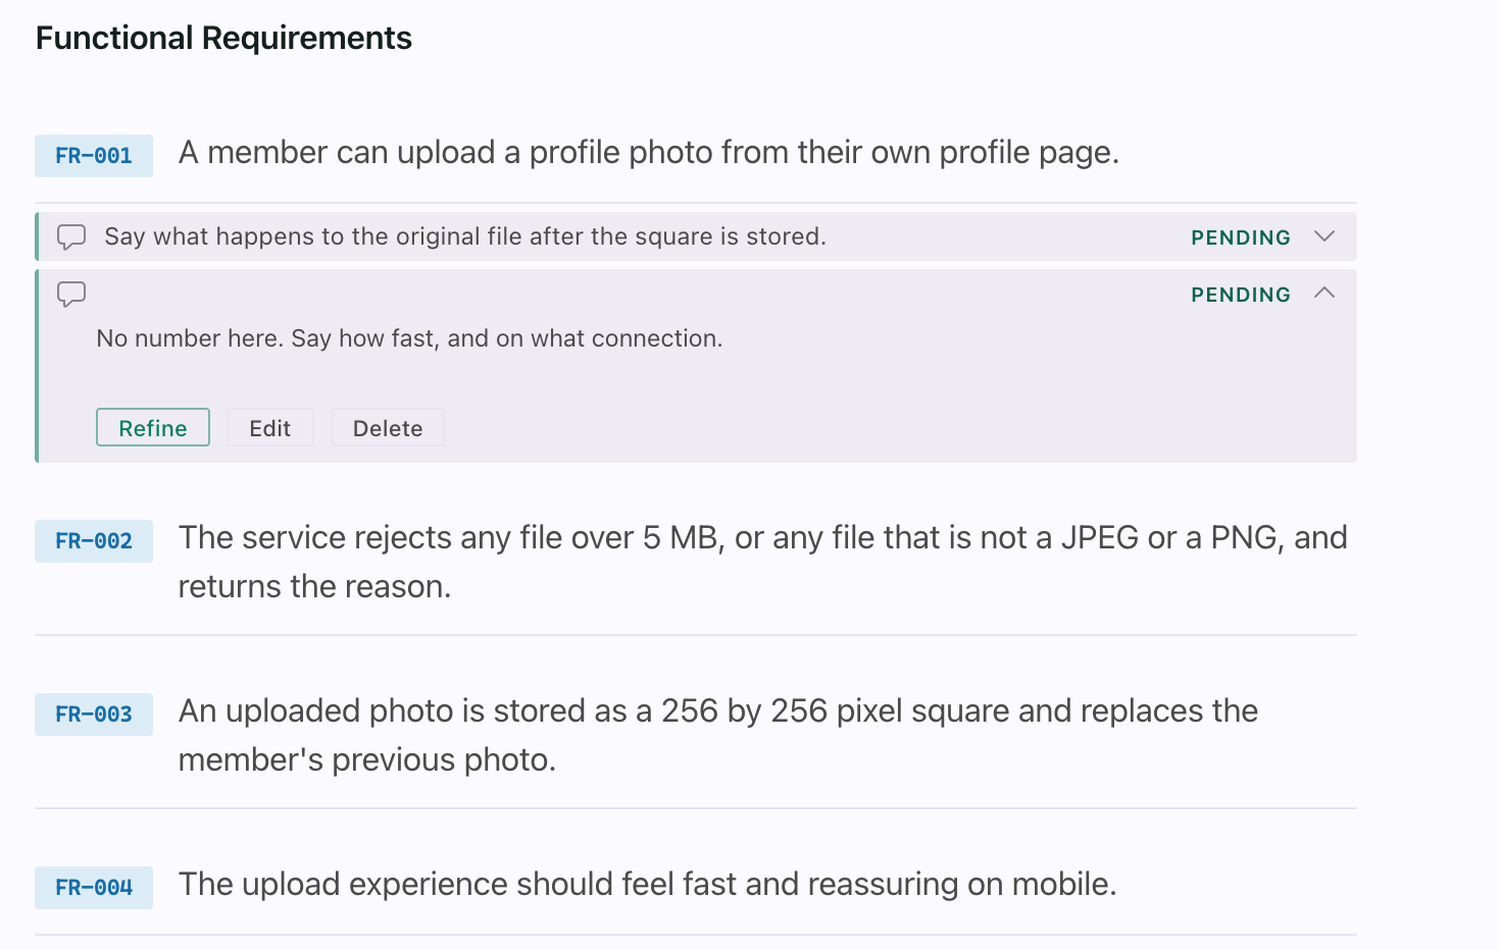
Comments are saved in .spec-context.json next to the spec, so the review travels with your branch.
Track progress
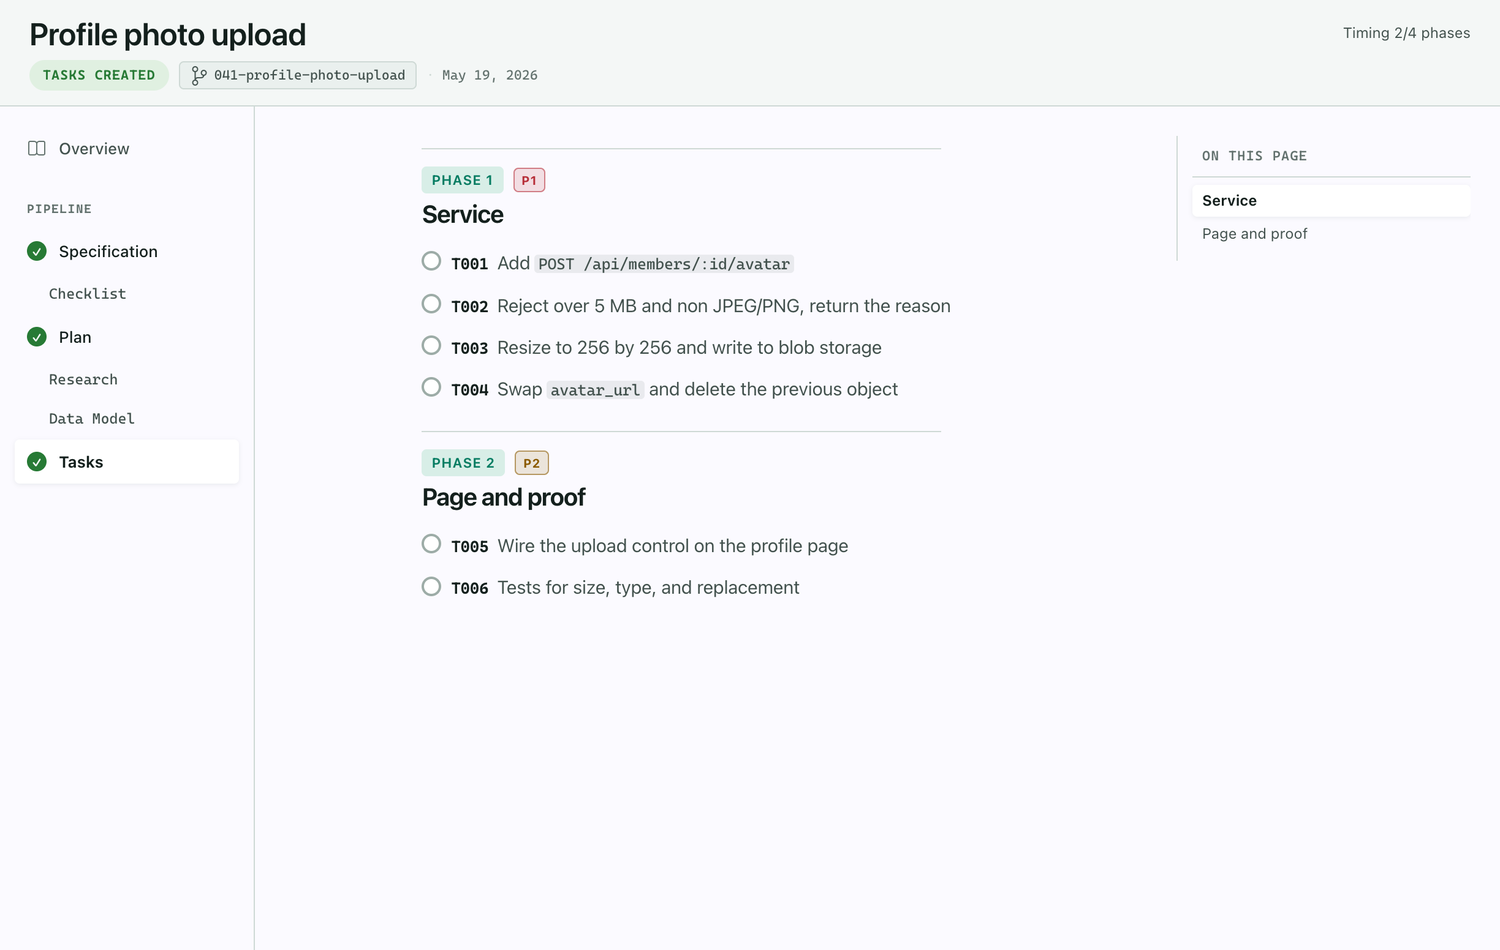
Section titled “Track progress”Three places tell you where a spec is: the rail, the sidebar and the footer. You don’t have to do anything to keep them current; they follow the files the run writes.
What you see
In the rail, a check when a step’s document exists, a spinner and a timer while it runs, and a lock on documents a running step has not reached. During implement, the Tasks tab shows a live percentage from the checked boxes in tasks.md.
In the sidebar, a spec in flight shows its last finished task and how long ago, like T004 · 2h ago.
In the footer, the next step by name, with Next: Plan above the button. There is no forward button while a step runs.
Read the Overview
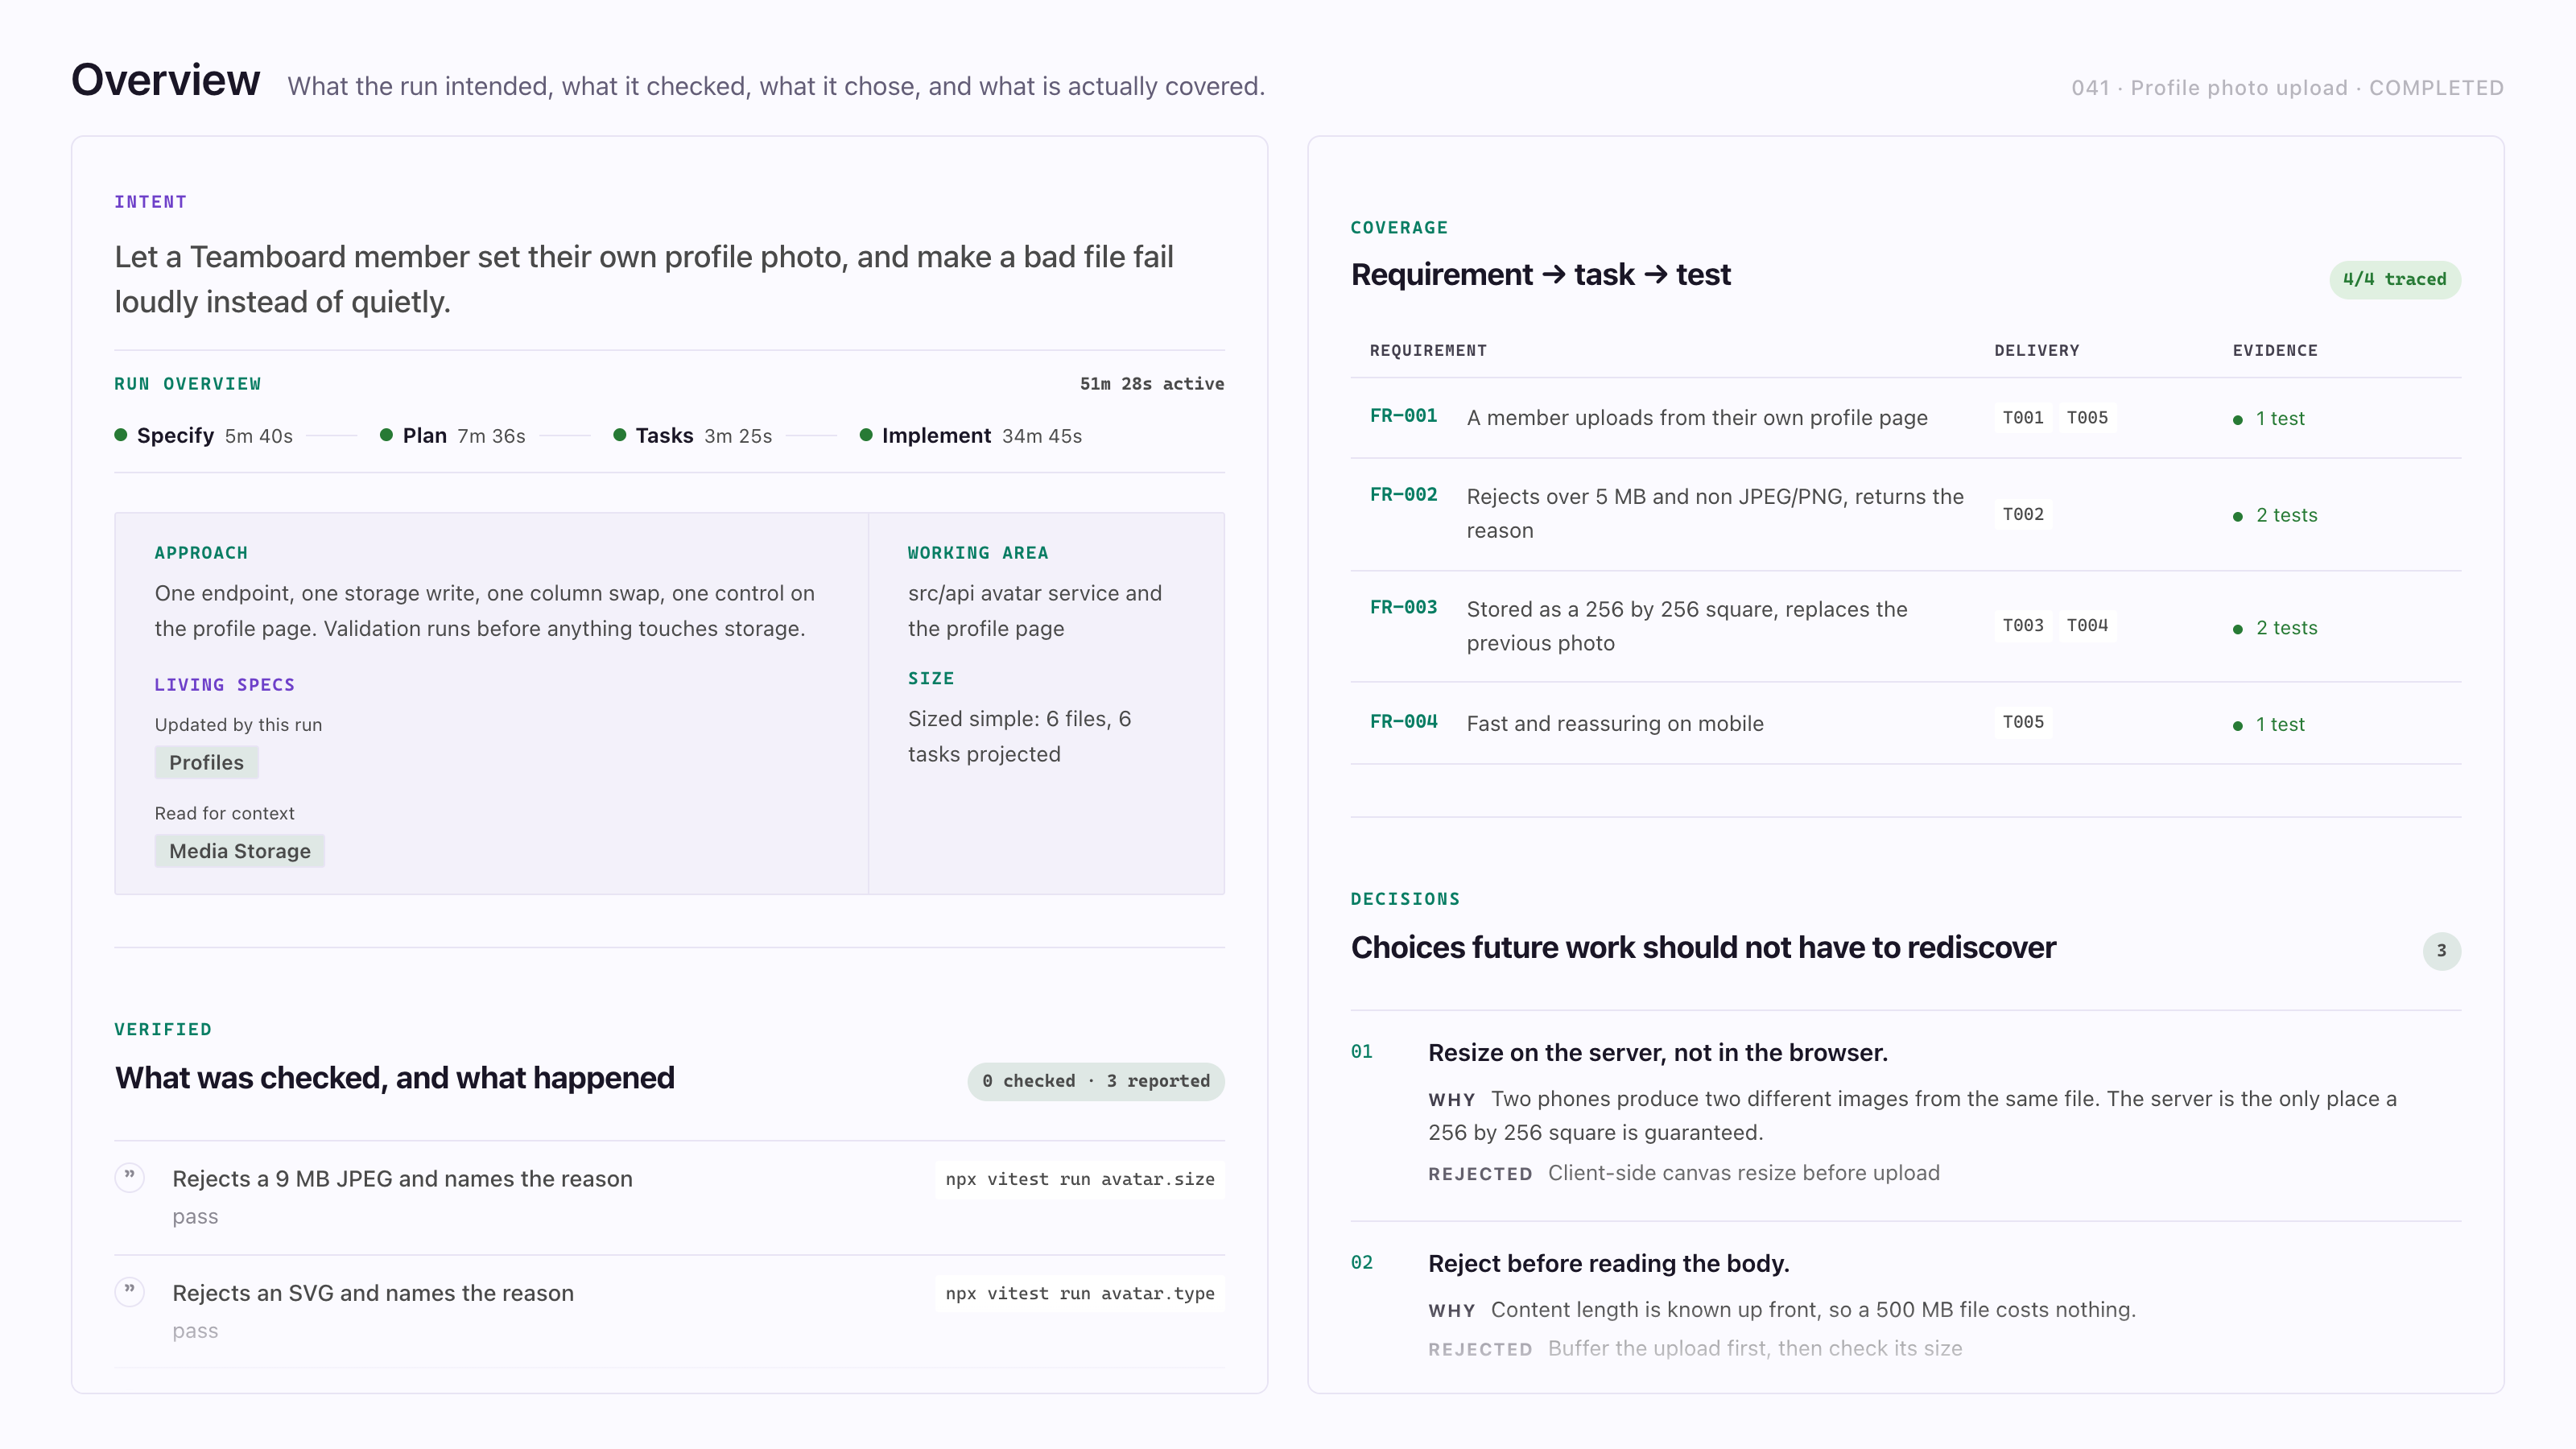
Section titled “Read the Overview”Click Overview, the first entry in the rail. It appears once the run has recorded something, and it fills in as each step lands.
What you see
The intent of the change, how long each step took, the approach, where in the code it works and how big it is. Later steps add what must stay true, each decision and what it rejected, and which tests cover which requirement.
Navigate
Section titled “Navigate”The sidebar
Section titled “The sidebar”The SpecKit icon opens four views.
- Specs groups your specs as Active, Completed and Archived, each with a count. Expand a spec to see each document and whether it exists yet. A Bugs group appears once Spec Kit’s bug extension has written a report.
- Living Specs lists the lasting spec for each capability, with a coverage count and a drift warning. It appears with the Companion Spec Kit extension.
- Steering gathers the standing files your assistant reads, plus Spec Kit’s constitution, scripts and templates.
- Settings & Feedback holds the Workflow Builder, settings and feedback links. It stays hidden until you turn on
speckit.views.settings.visible.
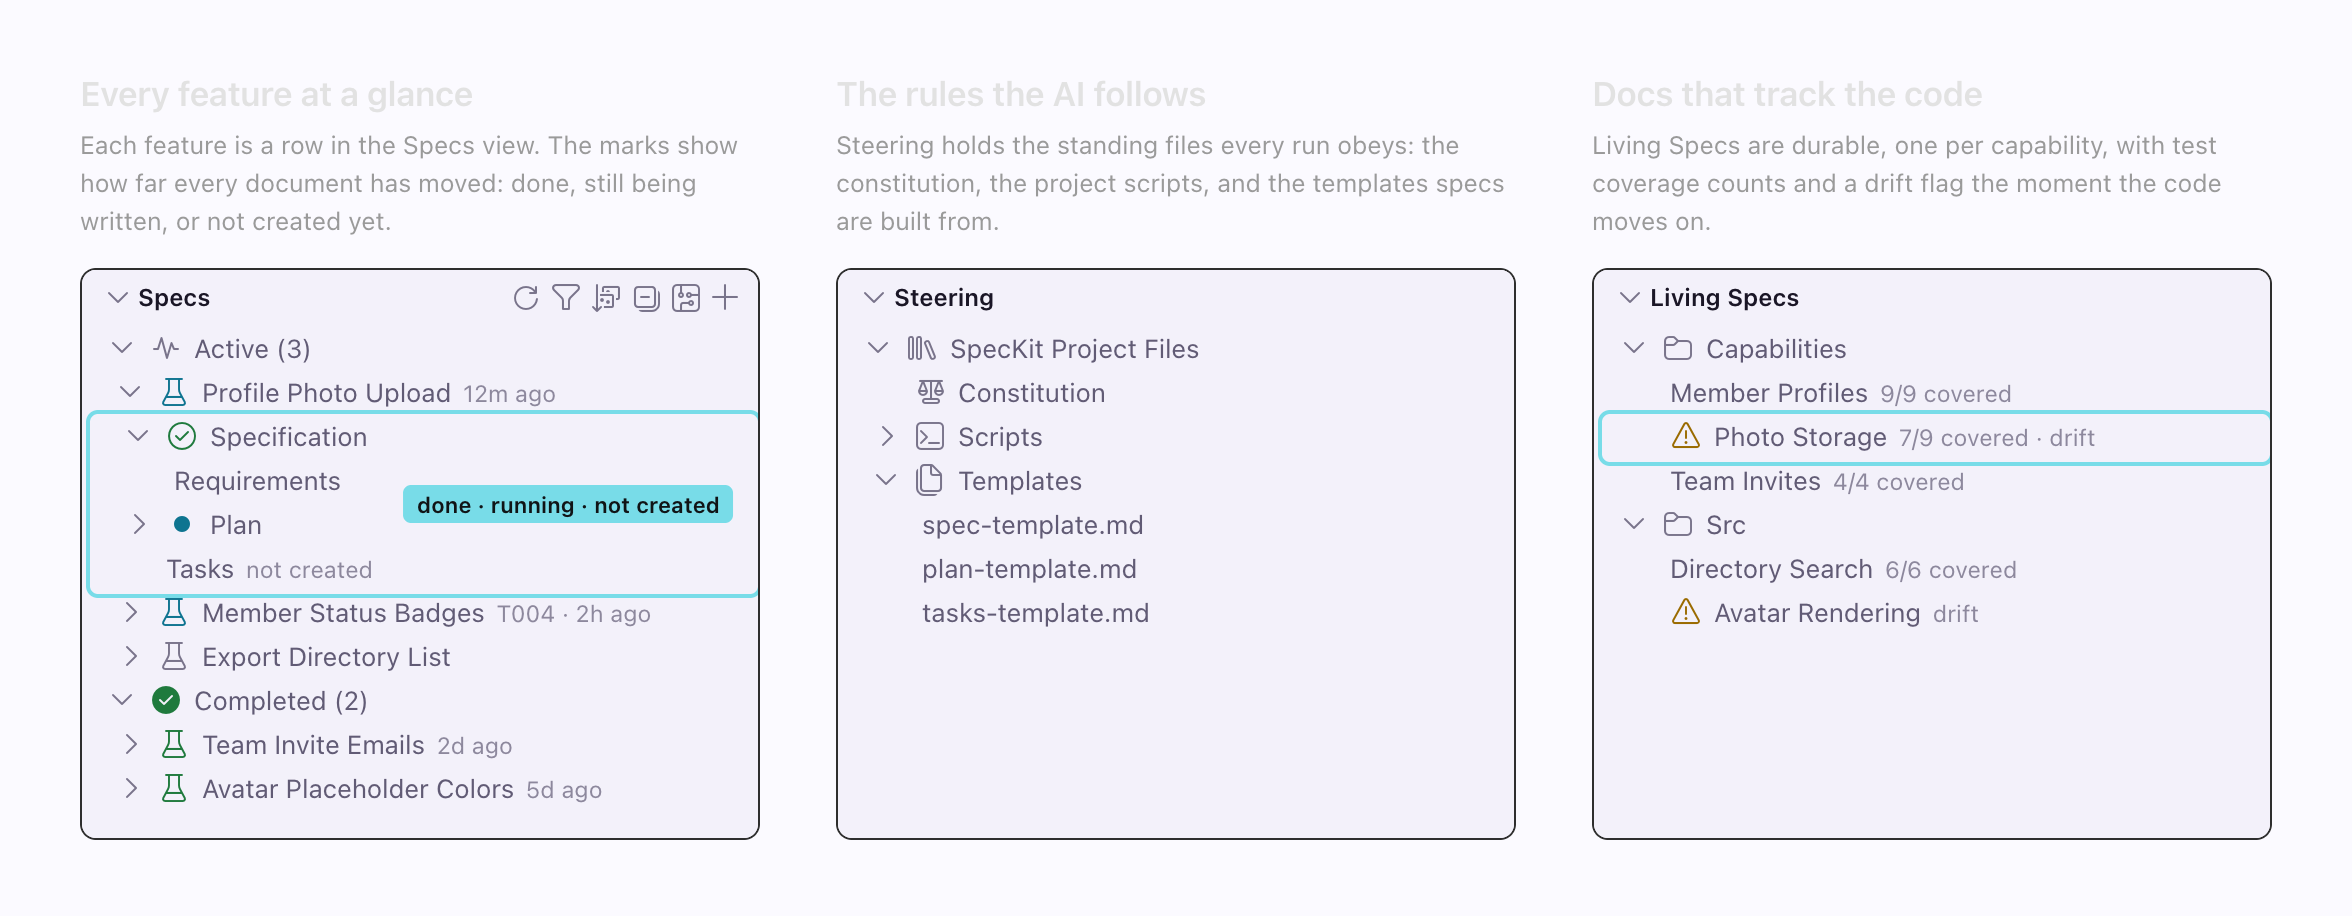
The sidebar covers every icon, mark and hover action.
Inside the viewer
Section titled “Inside the viewer”- The rail has the Overview at the top, then one tab per document step. Supporting documents, such as Checklist, Research and Data Model, sit under the step that wrote them. Clicking a tab only changes what you read. It never moves the run.
- On this page lists the document’s headings and follows where you are.
- Links between documents open in the viewer. A link to
tasks.mdfrom the plan opens Tasks at the heading it names, a link to another spec opens that spec, and a link to a source file opens it in the editor beside the viewer.
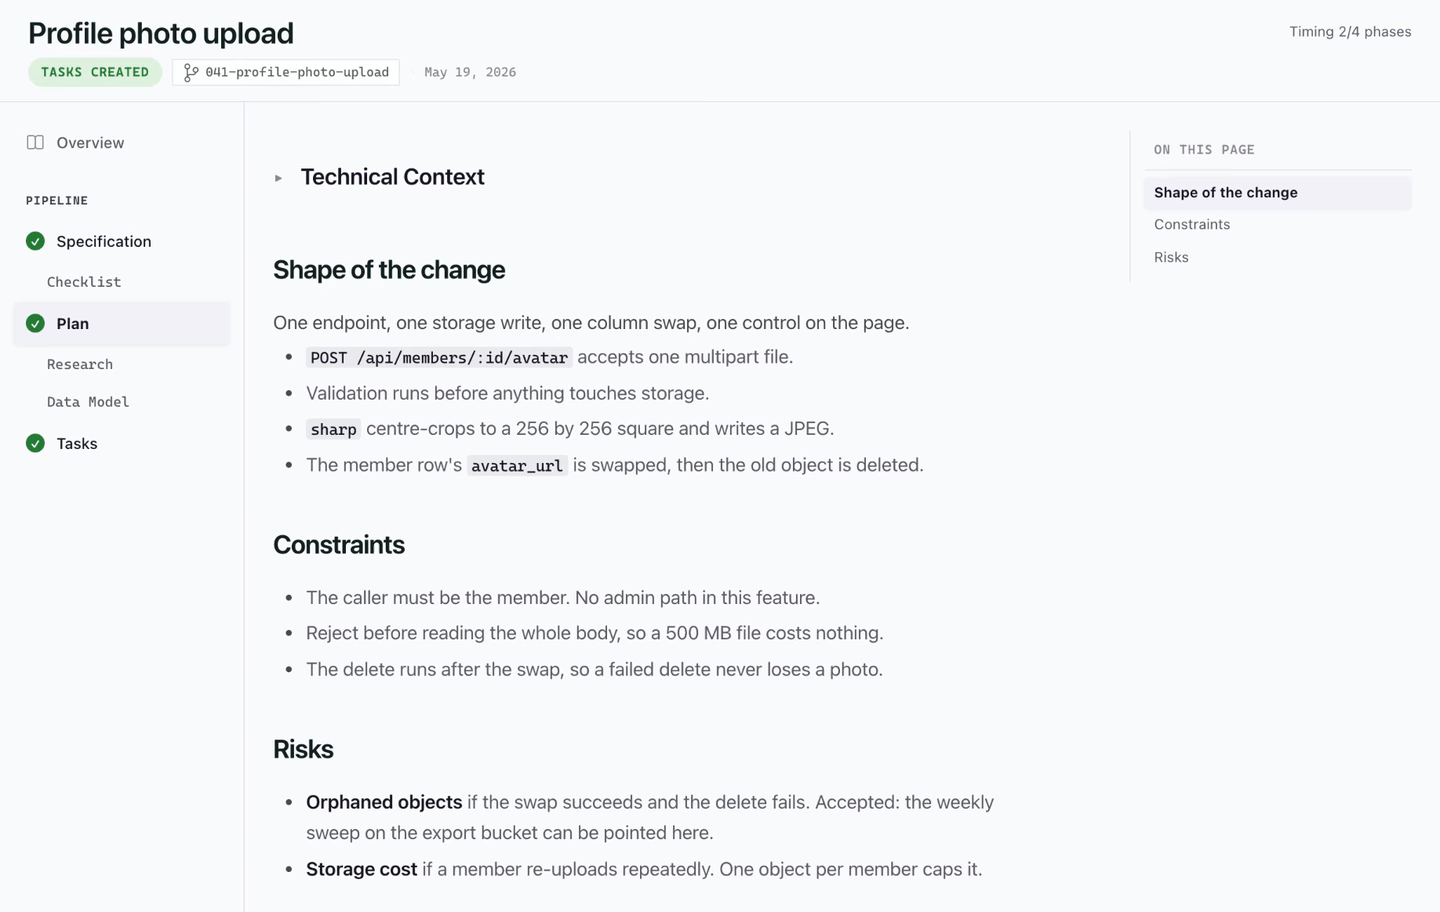
Inside the viewer covers the header, the footer and every state of the rail.
What comes next
Section titled “What comes next”Your spec has finished its first step. The rest of the loop runs the same way: plan, then tasks, then implement, one step at a time from the viewer footer, or all at once with Auto. After implement you can run Spec Kit’s own /speckit.converge from your assistant, and repeat implement and converge until the code matches the spec. The viewer shows converge in the rail and on the Overview, but it has no button to start it. Each step has its own page under Each step, starting with Specify.