Install in VS Code
In VS Code, SpecKit Companion is the full workspace: the sidebar, the spec viewer, review comments and the Overview. It works the same in Cursor, Windsurf and other editors built on VS Code.
The path has the same shape everywhere: Spec Kit itself, then the Companion extension for Spec Kit, which is optional but recommended, then the one thing your tool needs. Install where you work has the other two places.
Get Spec Kit
Spec Kit is GitHub’s toolkit for spec-driven development. Its
specifycommand sets a project up with the/speckitcommands your assistant runs.uv tool install specify-cli --from git+https://github.com/github/spec-kit.git --forceThis installs the GitHub build. The stock PyPI
specify-clihas noextensioncommand, so step 2 would fail with it. The command changes your globaluvtools.Then set the project up, from its root. Swap
claudefor your assistant, such ascopilot,geminiorcodex:specify init --here --integration claudeYou can skip that second command. In step 3 the Specs view offers Initialize Workspace, which runs it for the assistant you chose.
You should see
specify extension --helplistsaddandlist, and the project has a.specifyfolder.Add the Companion extension for Spec Kit (optional, recommended)
This is the engine half. It records each run, adds the Companion pipeline and Auto, and brings living specs. It needs Spec Kit 0.9.5 or newer.
specify extension add companion --from https://github.com/alfredoperez/speckit-companion/releases/download/companion-latest/companion.zip --forceRun it from your project root and copy it whole. The short catalog form does not work.
Without it the sidebar and the viewer still work with stock Spec Kit. You lose the run record, so the Overview has no step times, decisions or checks to show. You also lose the
/speckit.companion.*commands, Auto and the Living Specs view.You should see
A one-time untrusted source prompt, because the archive comes from a URL and not the catalog. Accept it. Then
specify extension listhascompanionin it.Install the VS Code extension and choose your assistant
Get it on the MarketplaceOr open it in VS Code. It is on Open VSX too, for Cursor, Windsurf and other editors. From a terminal:
code --install-extension alfredoperez.speckit-companionThe first time it starts, a picker asks which AI assistant runs your steps. Pick the one you use. Choose an AI provider covers the picker and how to change it later.
You should see
A SpecKit icon in the activity bar with the Specs and Steering views. With the Companion extension from step 2, a Living Specs view too.
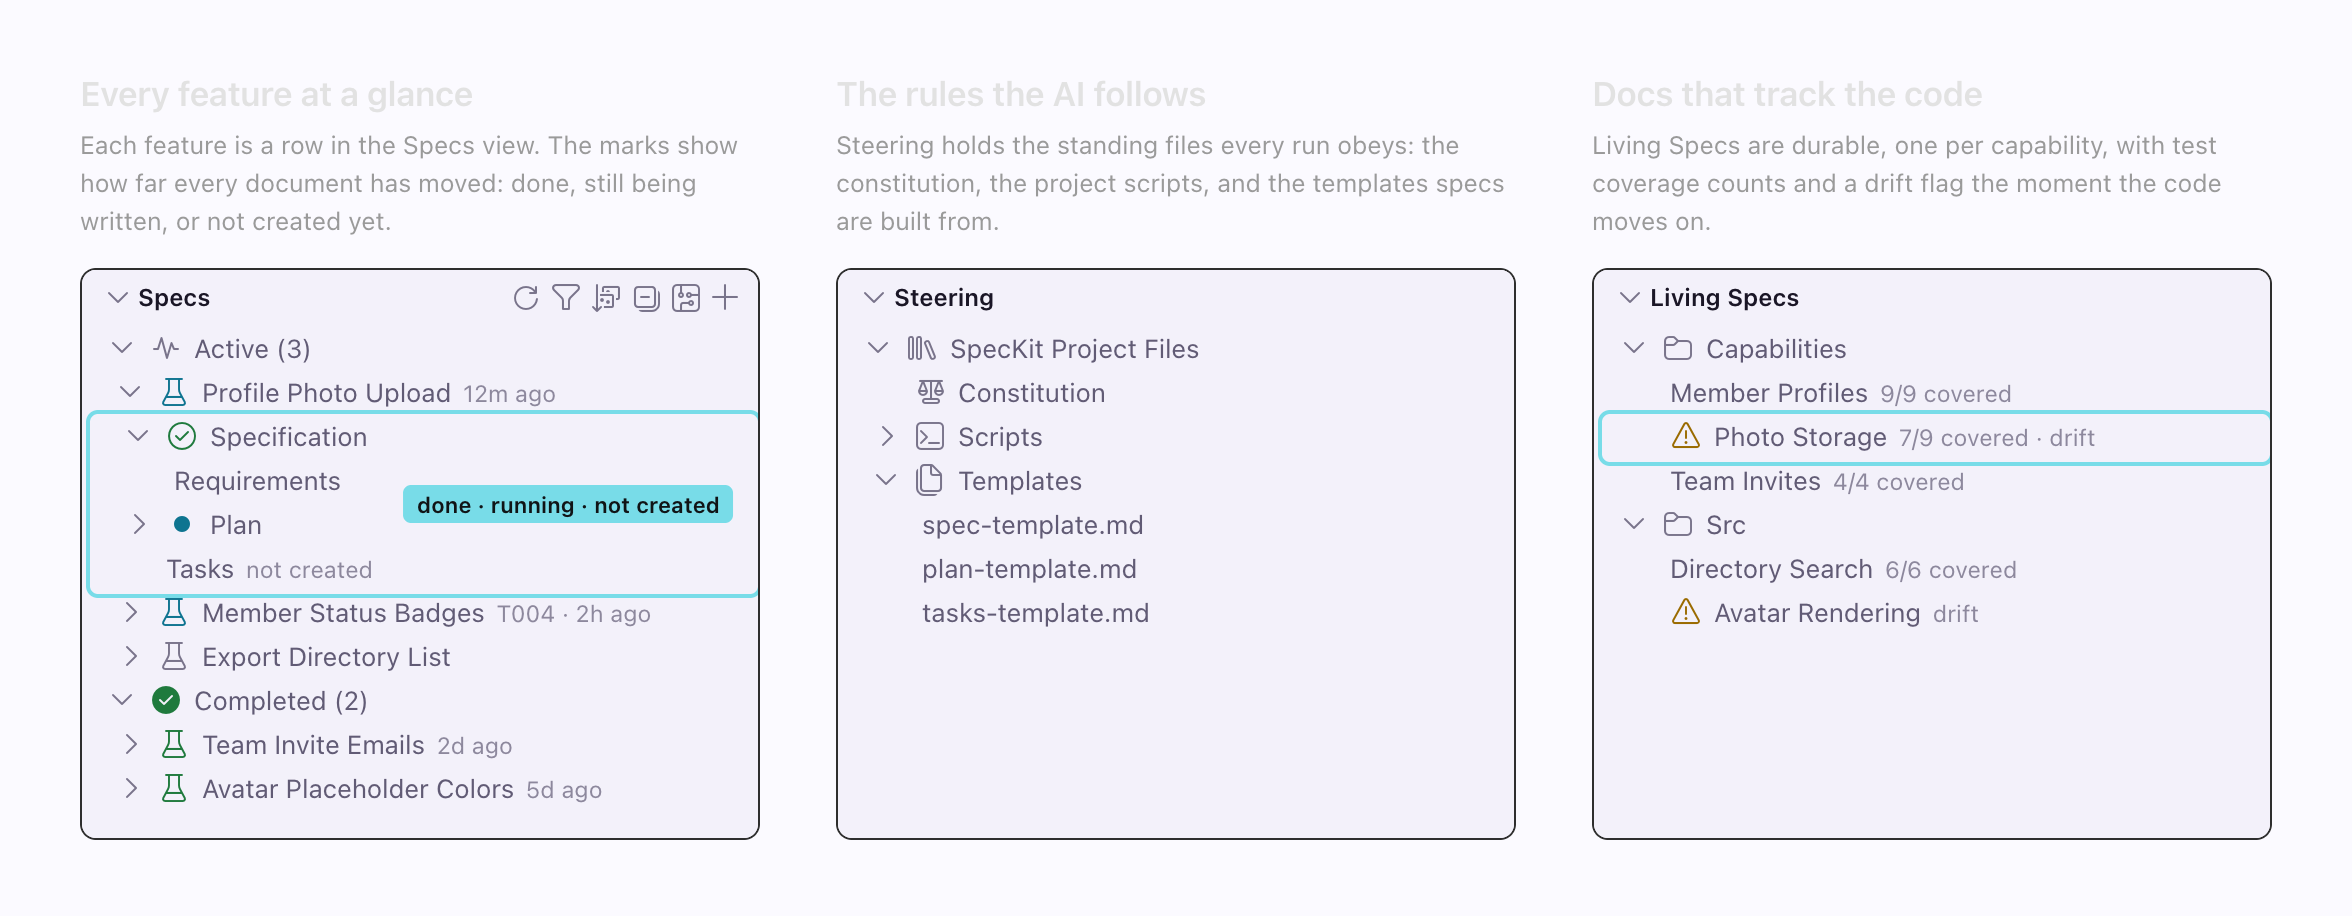
The sidebar's three views. Living Specs is the one the Companion extension adds. Check that it took
Click
+in the Specs view, describe a small change and press Create Spec.You should see
A new spec under Active in the Specs view, and the spec open in the viewer when your assistant finishes. With the Companion extension, your assistant also offers
/speckit.companion.*commands next to the stock/speckit.*ones.Your first spec walks through it with pictures.
Update it, or fix it
Section titled “Update it, or fix it”Update later has the command for each piece. If something did not work lists what you might see and what to do.
Related
Section titled “Related”- Choose an AI provider covers the picker and how to change it later.
- Your first spec creates a spec and runs its first step.
- Install where you work says what each piece is and where it installs.